The Neural State Studio™ in NeuroSync Pro Audio+Light lets you build your own timed audio and light sessions. Instead of working with fixed phases only, you design a timeline with keyframes: points in time where frequency, intensity, volume, colour and light effects can change.
This guide explains the Neural State Studio™ in practical language. Start simple: create a short session, add a few points, test at low intensity and only then build more detailed experiences.
Who can use the Neural State Studio™?
The Neural State Studio™ is part of the NeuroSync Pro Therapeutic Audio+Light edition. Personal and Therapeutic Audio can use and import supported sessions, but the full visual timeline editor is designed for Audio+Light because it includes the light, colour and DMX controls.
The basic workflow
- Create or duplicate a session. Start from an empty session or duplicate an existing one that is close to what you need.
- Set the basics. Give the session a name, category, goal, carrier frequency and total duration.
- Add named timeline points. Use these as landmarks such as Arrival, Deepening, Infinity Ganzfeld™, Return or Integration.
- Shape the graphs. Add and move points in the frequency, colour and intensity graphs.
- Test gently. Begin with low volume and light intensity before using the session professionally.
- Save or export. Save the session locally or export it as a shareable session file.
Opening the editor
- Open the Sessions & Programs block.
- Choose the category in which you want to work.
- Use Create for a new session, Duplicate to use an existing session as a starting point, or Edit to change one of your own sessions.
If the edit buttons are not visible, check that you are using the Audio+Light edition and that you selected a session you are allowed to edit.
Session basics
| Field | What it controls |
|---|---|
| Name | The title shown in the session list. |
| Category | Where the session appears in the Sessions & Programs block. |
| Goal or description | A short explanation of the purpose of the session. |
| Carrier frequency | The tonal carrier used by the audio engine. |
| Music crossfade | How smoothly music changes are blended. |
| Colour crossfade | How smoothly colour changes are blended. |
| Total duration | The complete length of the session. |
Named timeline points
The top graph is for named timeline points. These do not directly change the audio or light output. They help you structure the session and make the active section readable during playback.
- Double-click in the named timeline to add a point.
- Click a point to select it and rename it in the text field above the graph.
- Drag a point left or right to move it in time.
- Use the + and – buttons next to the time indicator for one-second adjustments.
- Press Delete or Backspace to remove a selected point, except for protected start points.
Frequency graph
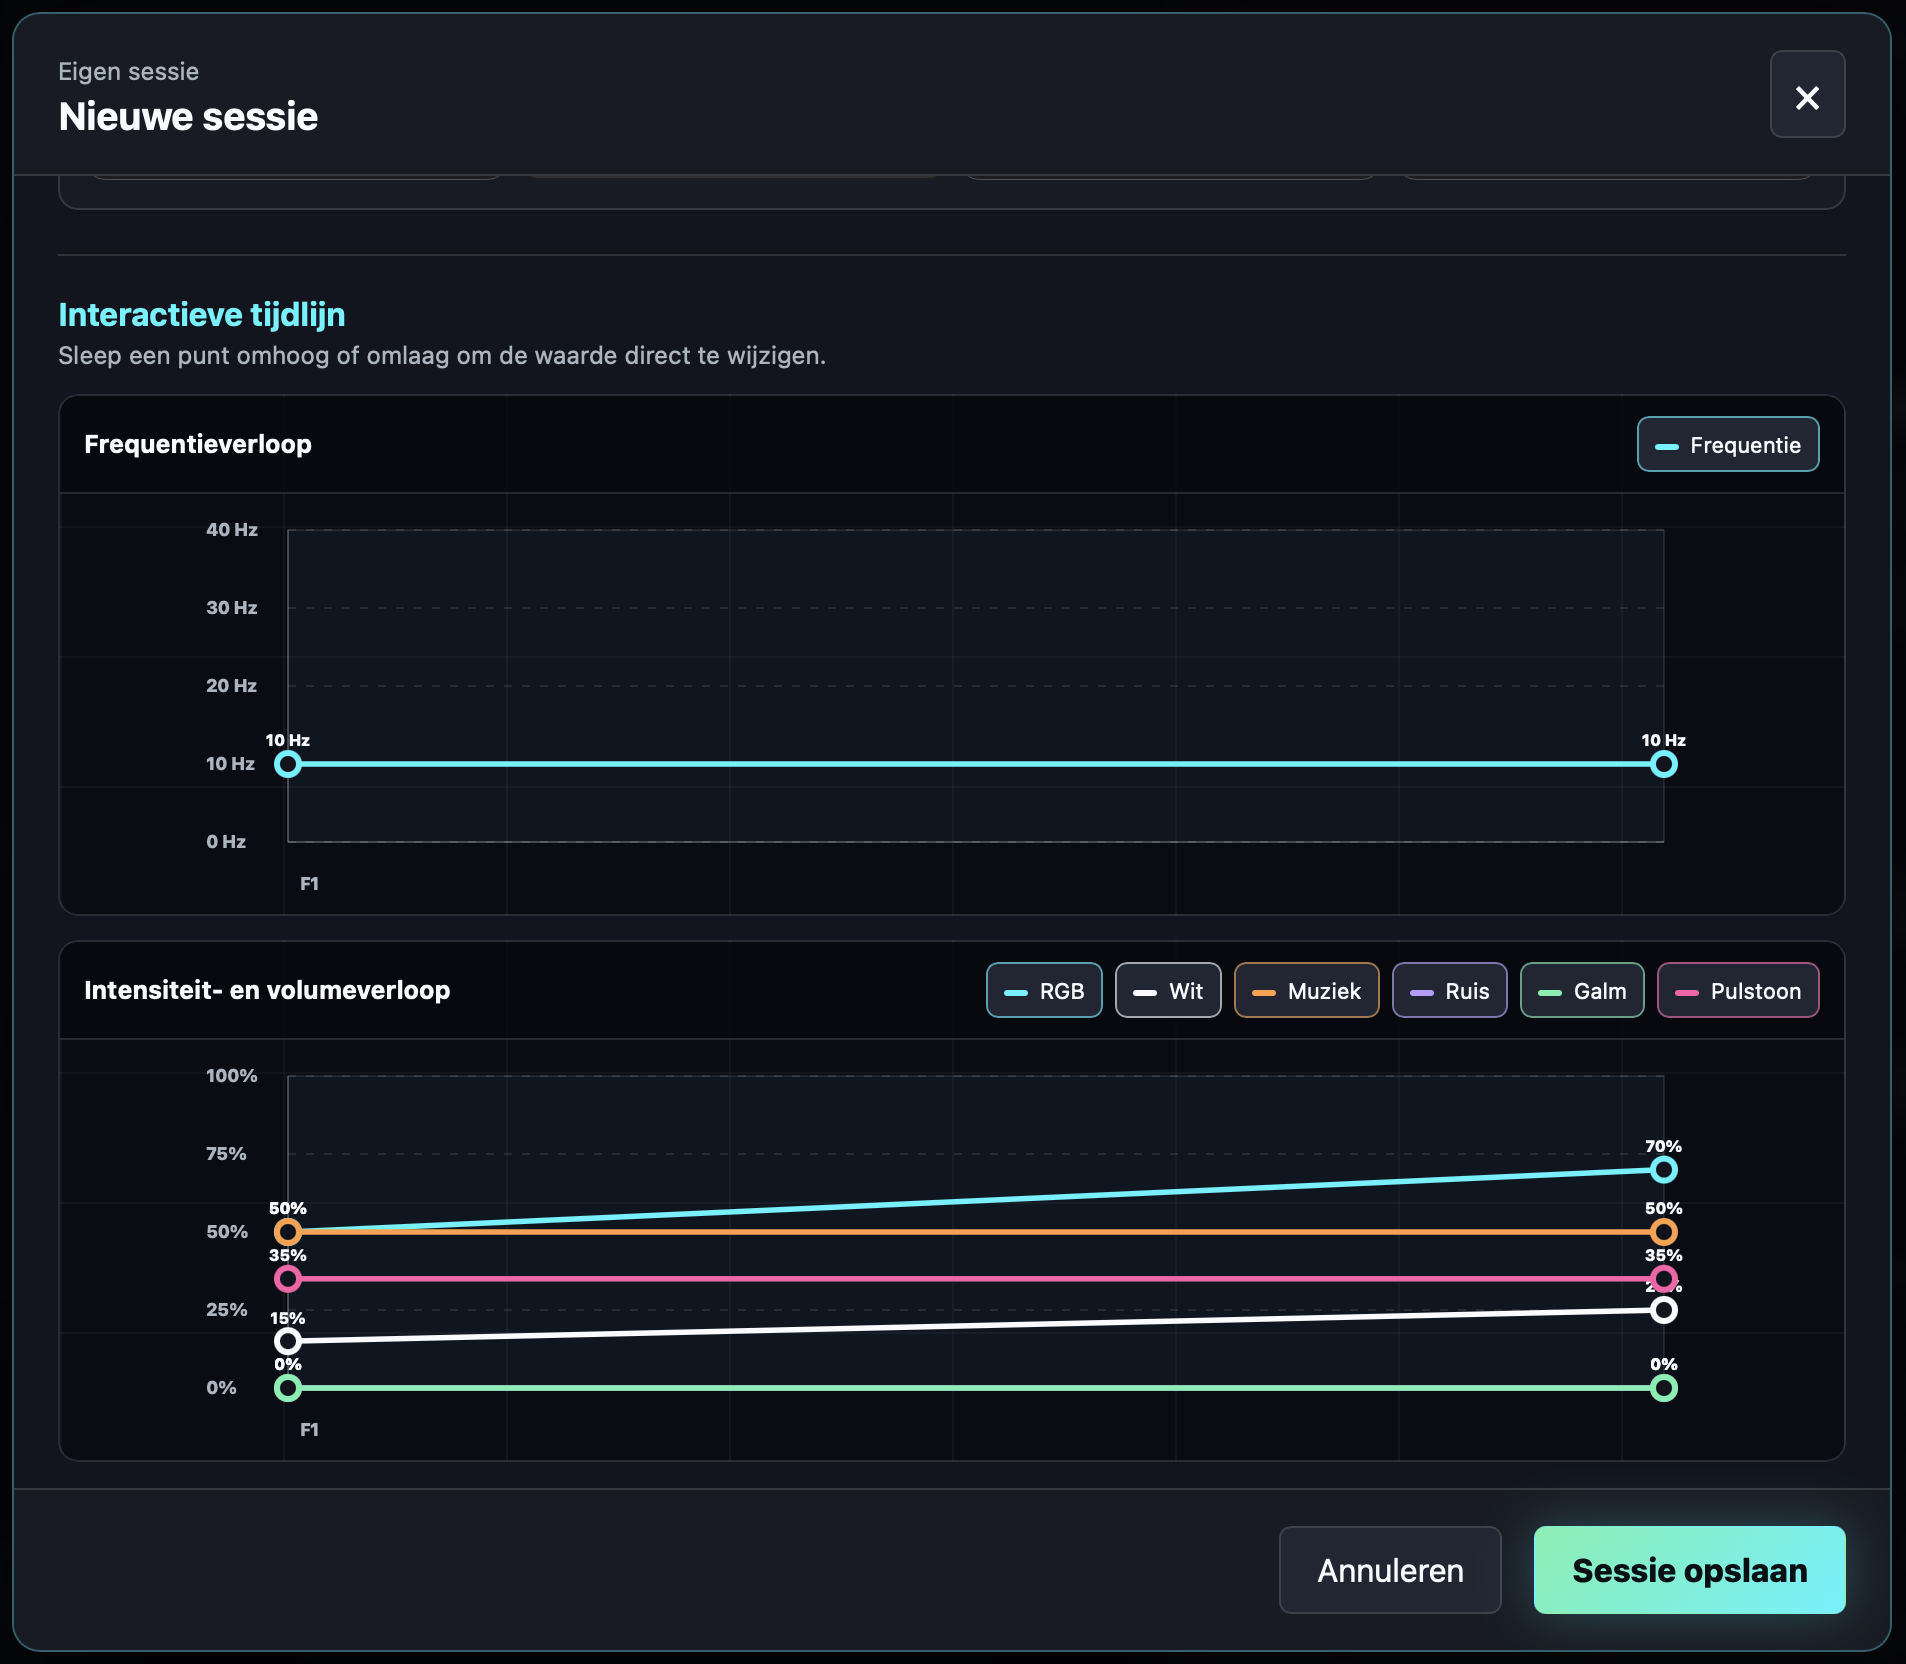
The frequency graph controls the stimulation frequency over time. Use gradual changes for most relaxation, hypnosis, meditation and focus sessions. Sudden jumps can feel abrupt, especially when light stimulation is active.
- Double-click in the graph to add a frequency point.
- Drag a point horizontally to change its timing.
- Drag a point vertically to change the frequency.
- Keep changes modest until you have tested how the session feels.
Colour progression graph
The colour graph controls the RGB colour over time. Each colour point can also hold light-effect settings. This makes the colour graph the place where you design the visual atmosphere of the session.
- Double-click in the colour graph to add a colour point.
- Select a point and choose its colour with the colour picker.
- Enable Infinity Ganzfeld™ on a colour point when that part of the session should use a continuous immersive light field.
- Set Aurora Immersion™ to subtle, medium, intense or custom when that part of the session should use moving colour variation.
- Use custom Aurora Immersion™ speed and depth only when you need precise control.
Infinity Ganzfeld™ and Aurora Immersion™ do not have to run for the whole session. When they are set on colour points, they become part of the timeline and can be used only in selected sections.
Intensity and volume graph
The intensity graph contains several curves. Depending on the current edition and available features, these can include RGB intensity, white light intensity, music volume, noise volume, reverb and pulse tone volume.
| Curve | Use it for |
|---|---|
| RGB | The strength of coloured light. |
| White | The strength of the white LEDs or white light layer. |
| Music | Background music level during the session. |
| Noise | White or pink noise level, if noise is enabled for the session. |
| Reverb | Spatial depth and ambience for the audio layer. |
| Pulse tone | The audible entrainment pulse level. |
Click the curve buttons to show or hide individual graphs. This keeps the editor readable when a session contains many curves.
Practical design example
A clear 20-minute relaxation structure could look like this:
| Time | Design intention | Possible settings |
|---|---|---|
| 0:00 | Arrival | Soft colour, low RGB, low audio volume, 10 Hz. |
| 4:00 | Deepening | Gradually lower toward 8 Hz, warmer colour, slightly more music. |
| 10:00 | Immersion | Stable frequency, smoother light, optional subtle Aurora Immersion™. |
| 15:00 | Return | Raise frequency gently, reduce intensity and reverb. |
| 19:00 | Integration | Fade light, music and pulse tone toward the end. |
Testing before use
- Start with low master volume and low light intensity.
- Check that the selected audio device works before the session starts.
- For Audio+Light, test the DMX fixture with a static colour before testing pulsing or effects.
- Play through the complete session once before using it with someone else.
- Watch for abrupt jumps in colour, volume, frequency or brightness.
Saving, importing and sharing
After saving, the session appears in the selected category. You can also export a session file and import it later or share it with another compatible NeuroSync Pro installation.
Imported sessions should still be tested locally. Hardware, room size, headphones, speaker level and light distance can change how a session feels in practice.
Common mistakes
- Too many points: a session becomes hard to read and may feel restless.
- Too much light: high RGB and white intensity can become uncomfortable quickly.
- Unclear structure: without named timeline points, it is harder to understand what the session is doing.
- Noise everywhere: white or pink noise works best when used deliberately, not automatically throughout every session.
- No full test: skipping through the timeline does not reveal all transitions.
Safety note
Do not use rhythmic or flashing light stimulation with people who have photosensitive epilepsy, seizure disorders or unexplained loss of consciousness unless an appropriate medical professional has cleared this use. Stop immediately if someone experiences headache, nausea, eye pain, dizziness, panic, agitation or disorientation.
NeuroSync Pro is not a medical device and does not diagnose, treat, cure or prevent medical or psychiatric conditions.